Hand made Zelda Hylian Shield

A new hand made Hylian shield for my Twilight Princess Link costume.

When I first made my Link costume 4 years ago, I thought that making a shield by myself would be impossible, so I ordered a replica online (pictured on the left below). 

However, as good as this shield looks, it has some problems. It weighs over 8 pounds and it gets tiring to carry around all day. The handle is made with really cheap materials and kept breaking. If it breaks during a day at a convention, I don’t have a drill around to redrill the holes to repair it. The shape is also inaccurate to the Twilight Princess shield design. In addition, every other part of my costume I made myself and when people ask, "Wow your costume is great. Did you make all of that yourself?" I proudly say "Yes I did!" and then they say "Wow the shield is the BEST PART." and then I have to embarrassingly reply with that’s the one thing I DIDN’T make.

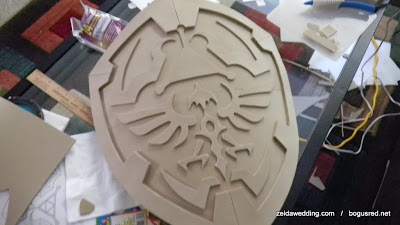
Since I’ve been so successful with making craft foam props for my Zelda wedding, it didn’t seem impossible anymore to make my own shield. This shield (pictured right below) is made totally from craft foam, hot glue gun glue, and acrylic paints. It weighs almost nothing, looks more accurate, and I can finally say "I made my whole costume myself." It still needs a few minor details and refinement on the paint. But it was good enough to show off on Halloween day.

DSCN1391.JPG
From Link Costume, the making of


Here’s an inprogress shot of what it looked lilke before the paint:

DSCN1376.JPG
From Link Costume, the making of


Wedding – Save the Dates

wedding-std.jpg I decided early on that I did not want to do pre-designed invitations and Save the Dates (STDs). None of them feel like Zelda. Almost all of them are flowery motif crap. So I designed all of my own stationary, instead.

I’ve heard the STDs are a chance to be fun and show your personality, whereas the invitations are more formal. I gave the design a very Wind Waker like style and added a cute drawing of Mike and I on it in a paper cut style. I reused some elements from the website design.

I got the design printed on postcards from psprint.com (fast, cheap, great quality!). It cost $30 for 100 printed cards and shipping (but I only mailed 70 of them). I then purchased envelopes for $25 through amazon.

Include postage and the total came out to about $1.25 each. Not bad, eh?


Wedding – Favors part 1

lantern favor

Coming up with something for the favors was really tricky. I didn’t want to spend more than $2 per favor, but I still wanted something that reflected our Legend of Zelda theme. I had found a cute set of little tea light lanterns that I almost bought, which remind me of the magic lantern from Zelda. But couldn’t find them at a price within my budget. Note: Some places will advertise a lower price like $1.50 per lantern, but jack up the shipping price. 


bottle favor 
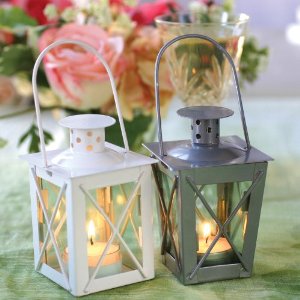
But what I found instead was much better. I found these cute round clear cork top glass bottles at only $0.50 each from save-on-crafts.com. These remind me of the potion bottles Link uses to replenish his health. My thought was to fill them with colored candy, something similar to nerds. Guests can enjoy the candy, then reuse the bottle as a vase for flowers or something.
 
A few notes if you do order these bottles, you’ll need to ensure none of them are flawed, broken, or chipped. They also were rather dirty and dusty. I ran all the bottles through the dishwasher and soaked the corks in soapy water and air dried them.
 
More to come on the candy and decoration of these favors in a later post.