Hand made Zelda Hylian Shield

A new hand made Hylian shield for my Twilight Princess Link costume.

When I first made my Link costume 4 years ago, I thought that making a shield by myself would be impossible, so I ordered a replica online (pictured on the left below). 

However, as good as this shield looks, it has some problems. It weighs over 8 pounds and it gets tiring to carry around all day. The handle is made with really cheap materials and kept breaking. If it breaks during a day at a convention, I don’t have a drill around to redrill the holes to repair it. The shape is also inaccurate to the Twilight Princess shield design. In addition, every other part of my costume I made myself and when people ask, "Wow your costume is great. Did you make all of that yourself?" I proudly say "Yes I did!" and then they say "Wow the shield is the BEST PART." and then I have to embarrassingly reply with that’s the one thing I DIDN’T make.

Since I’ve been so successful with making craft foam props for my Zelda wedding, it didn’t seem impossible anymore to make my own shield. This shield (pictured right below) is made totally from craft foam, hot glue gun glue, and acrylic paints. It weighs almost nothing, looks more accurate, and I can finally say "I made my whole costume myself." It still needs a few minor details and refinement on the paint. But it was good enough to show off on Halloween day.

DSCN1391.JPG
From Link Costume, the making of


Here’s an inprogress shot of what it looked lilke before the paint:

DSCN1376.JPG
From Link Costume, the making of


Master Sword sleeps.

Just as the Master Sword in Zelda laid sleeping in the forest, I’ve been sleeping on the blog posts.

I haven’t posted for a while because I’ve been waiting for the professional photos to be ready. Just saw them yesterday and I’ll be getting the high res files soon and making more blog posts.

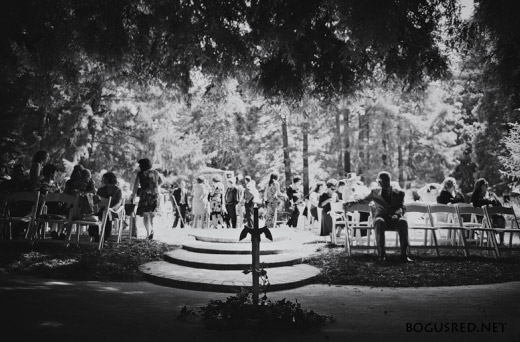
In the meantime, here’s a quick taste. I love this shot because it reminds me so much of Zelda and some of the official art that has been created. Amazing. And I didn’t even instruct them to do it either.


wedding-ceremony-sword.jpg

Photo by JLPhotografia


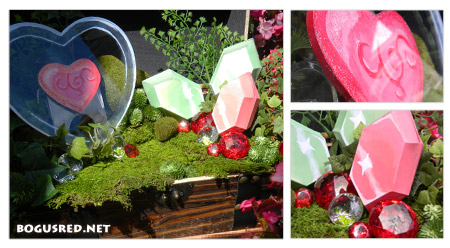
Wedding – Heart Piece in chest

It seemed fitting for our sweet heart table to have the Zelda Piece-of-heart as a centerpiece. To dress it up more, I created a foliage arrangement inside a treasure chest with rupees and jewels.


zelda heart piece in chest


The chest is a ready made chest found at a craft store. The foliage is made from preserved moss, plastic jewels, fake ferns and ivy, moss rocks, mini pine cone filler. The heart piece is made from plastic custom cut at Tap Plastics and craft foam for the red heart, painted with liquitex acrylic paints and glitter glue. The rupees are paper craft.

My new husband will always have a piece of my heart ^.^

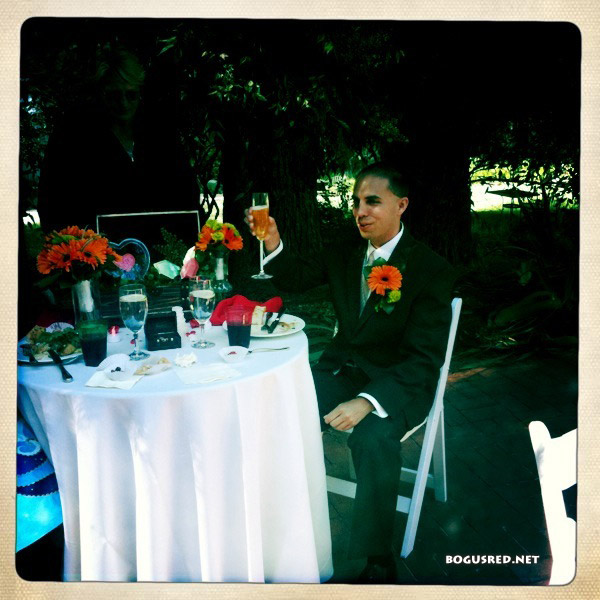
Mike cheers at sweetheart table


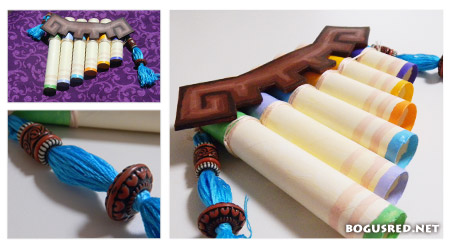
Wedding – Spirit Flute Centerpiece

This centerpiece is the Spirit Flute from Legend of Zelda: Spirit Tracks. Link looks so adorable playing it.

Believe it or not, it’s made from Playtex gentle glide tampon holders. No I’m not joking. I got the idea from TamponCrafts.com.

Other materials include craft foam for the front plate, beads, cross stitch floss, and liquitex paint.

zelda wedding pan flute centerpiece


Wedding – Banners and more Favors

So I learned that there’s a technique called bunting where you take triangles of fabric and sew them inbetween a thin strip of fabric to create banners. I thought this would be suitable for the wedding because its a quick and easy way to add color to various areas of the venue and it also has a medieval look to it.

I also painted a water pattern and a few triforces to make it more Zelda-ish.

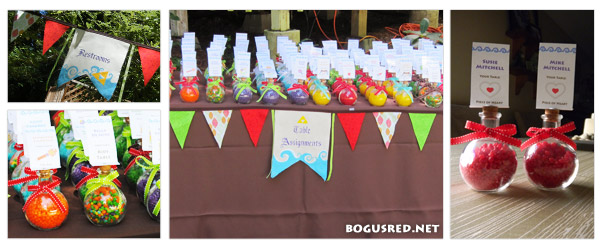
I created three signs; table assignments, bathroom, and spirits (for the bar!). Pictured below are a couple of the signs as well as the favors as they were displayed on the favors table.

The favors doubled as table assignments and contained the guest’s name and a picture of the centerpiece of their table, so they would know visually what table they were to go to.

zelda wedding favors table flags bunting


Wedding – Slingshot Centerpiece

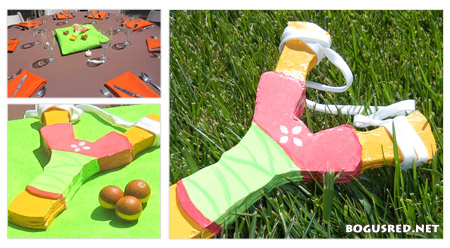
Today I have another Zelda wedding centerpiece; the slingshot. Originally I was going to base this off of the slingshot from Ocarina of Time. But when I saw the Skyward Sword slingshot design, I knew that would be a better fit. But I did at least include the deku nuts amunition from Ocarina of Time.

The artistic style and colors of Skyward Sword and Wind Waker are much brighter and more colorful. So this is why I chose for both the bow & arrow and the slingshot to be based on the Skyward Sword designs.

Made from craft foam, acrylic paint, and lanyard cord. The deku nuts are just small Styrofoam balls painted with acrylic paint.

sling shot pictures


Wedding – Boomerang Centerpiece

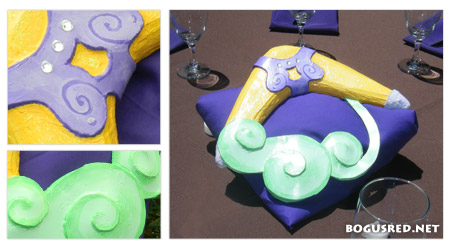
Another centerpiece from my Zelda themed wedding, the boomerang. A classic weapon used by Link to stun enemies and grab hard to reach items. I wish I had better quality photos of this one. I’m sure the professional photos will look much better but they wont be ready until another 8 weeks or so.

The design for this was modeled after the Wind Waker boomerang. Except I changed the center portion from gray to purple. Purple is complementary to yellow so it works well. I also added a wind swirl element to make it more interesting and wind waker-like.

Made from craft foam, modeling paste, acrylic gel, acrylic paint.

zelda boomerang centerpiece


Wedding – Bow and Arrow centerpiece

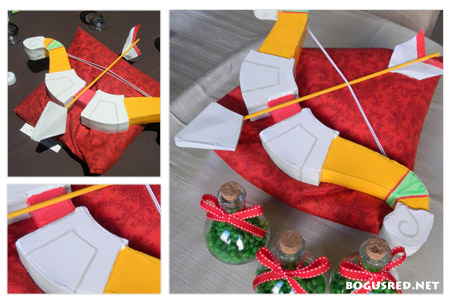
Another centerpiece for you, the Bow and Arrow. Central to every Zelda game, the bow and arrow is useful to Link to both attack enemies and solve dungeon puzzles. The design for this bow and arrow immitates the design from Legend of Zelda: Skyward Sword.

The bow is made from craft foam, a bit of marble paste, and a string of elastic. The arrow is made from a wooden dowel, paper, and craft foam. Both painted with liquitex acrylic paint.

Did I mention that it really shoots?

bow and arrow


Wedding – Bomb Centerpiece

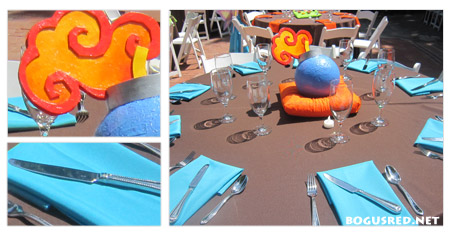
Early in our planning, Mike and I came up with the idea of having each of the dining tables have a centerpiece based on one of the items in Zelda. The very first item I made was the bomb. Bombs are one of my favorite items in the game. You can use them to blow open secret passage ways and kill enemies.

One of my favorite aspects of the Legend of Zelda: The Wind Waker, was the way that the smoke animation was done for the bombs. It’s this beautiful swirly color changing cloud and I wanted to capture that in my bomb centerpiece.

A few family members might be turned off by a bomb at a wedding, but there’s no way I could leave it out. It’s such an important and iconic item in The Legend of Zelda and is perhaps my favorite centerpiece. I wish I had a plushy version of it to squeeze at night because it’s so cute!

This was made using a giant Styrofoam ball, craft foam, acrylic gel medium, marble paste, and acrylic paints.

bomb centerpiece


Wedding – First Dance

It finally happened! Mike and I were married yesterday at Hazlwood. The weather was beautiful and we were so happy to share such a wonderful day with our family and closest friends.

Mike and I have something specific we’d love to share with you first. Our first dance was a little different. I hope you enjoy our Numa Numa wedding dance.

Special thanks to our good friends Kim, Potter, Jason, Ashley, Maya, Aron for helping out!

[youtube-ExrUjggt2oM]

More Zelda Wedding related posts to come soon.