Hand made Zelda Hylian Shield

A new hand made Hylian shield for my Twilight Princess Link costume.

When I first made my Link costume 4 years ago, I thought that making a shield by myself would be impossible, so I ordered a replica online (pictured on the left below). 

However, as good as this shield looks, it has some problems. It weighs over 8 pounds and it gets tiring to carry around all day. The handle is made with really cheap materials and kept breaking. If it breaks during a day at a convention, I don’t have a drill around to redrill the holes to repair it. The shape is also inaccurate to the Twilight Princess shield design. In addition, every other part of my costume I made myself and when people ask, "Wow your costume is great. Did you make all of that yourself?" I proudly say "Yes I did!" and then they say "Wow the shield is the BEST PART." and then I have to embarrassingly reply with that’s the one thing I DIDN’T make.

Since I’ve been so successful with making craft foam props for my Zelda wedding, it didn’t seem impossible anymore to make my own shield. This shield (pictured right below) is made totally from craft foam, hot glue gun glue, and acrylic paints. It weighs almost nothing, looks more accurate, and I can finally say "I made my whole costume myself." It still needs a few minor details and refinement on the paint. But it was good enough to show off on Halloween day.

DSCN1391.JPG
From Link Costume, the making of


Here’s an inprogress shot of what it looked lilke before the paint:

DSCN1376.JPG
From Link Costume, the making of


Happy Halloween! Ike complete

Mike’s costume is done and looked great!

From Halloween 2008 Ike, Link

I had to work late on Wednesday night so I had less time to spend on Mike’s costume. On Thursday evening Mike tried on his costume and we realized that we could do without the pauldron+chest piece so we’ll save that for another time. Also we did not do the black boot covers. Since we decided to not do those pieces, I had a chance to do some changes to my costume. I made a new set of pants that are stretchy and more slim fitting and fixed my chainmail that broke at AX. Pants are still a little loose but I can bring in the seams more.

And we looked mighty fine!

From Halloween 2008 Ike, Link

 I think I’m going to retire my TP Link costume for a year or two. The next costume I make is going to be simple and comfortable.


3 days ’till Halloween

Another quick update…

The headband, red skirt, and wig are complete. I did the cuting on the wig and decided not to do any spikey styling to it. It looks fine how it is. I might try spiking it for Fanime.

Final items to create in order of priority are :

  1. pauldron+chest piece (5%) – 4-6 hours
  2. pants (95% bring in seems) – 10 minutes
  3. boots (50% create black wraps) – 2 hours

So I have another 6 to 8 hours of work ahead of me. I should have time Thursday night but tomorrow I will be pretty busy.

I likely wont have time to fix my chain mail or make my new pants for my link costume 🙁


4 days ’till Halloween

This is just a quick update.

Late last night I finished Mike’s coat. It turned out pretty good! I’m excited and can’t wait to finish the rest of his costume. I don’t have photos yet but I will.

I purchased boots online for Mike that are almost identical to the $7 pair I found at Goodwill for my Link costume. I received them in the mail last week thankfully!

Major elements left to finish for the Ike costume:

  • Headband – 30 min. of work
  • Red skirt – 30 min.
  • Pants – 10 min.
  • wig – 1-2 hours
  • gloves – 2 hours
  • pauldron, breast plate – 4-6 hours
  • black leggings on boots – 2 hours


For my costume, I will be Link again. I hope I have time to make a new pair of pants. I found a better material that’s stretchy. Should take a couple hours to make. Also my chainmail is broken. Much of it broke at my last con. It will probably take 5 hours of work at least to repair it.

I might be staying up late the next few nights to try and get everything done.


Ike Costume – finished jacket pattern, gloves, belt

The prototype for Ike’s jacket is complete. I’ve made it into pattern pieces and laid it out on my fabric for cutting. I’ve already cut the pieces but it’s not shown here. I only have a week left to actually put it together. I hope I can do it!

From Cosplay Ike, the Making Of

The main belt is done. My photos show part of the process. The belt took about a total of 3 hours to make.

From Cosplay Ike, the Making Of

I started working on a prototype for the gloves last night and it went very well. It took about an hour and a half to do while watching tv and stuff. I have some photos of the prototype:

From Cosplay Ike, the Making Of

 I will probably start sewing the jacket tonight or tomorrow. No more tv for me from now until Halloween! I have a lot still left to do.


Status of major items that I must have done:


wig – 50%

I have the wig. I just need to style it

green head band – 0%

This will only take an hour to make.

cape – 100%

Did this in a couple hours

blue jacket – 45%

The prototype is complete but now I need to make the final piece. It has a lot of trim so it will take some time to make.

gloves – 20%

Prototype is done. Need to cut final fabric and sew.

main belt – 99%

Just need to cut the holes for the buckle to go through but I don’t want to do that until Mike is in the costume.

pants – 90%

Pants are mostly done. But they’re fitting a little loose so I’ll probably bring them in a bit.

sword – 100%

bought from party store


Ike Costume – prototyping

Mike’s Ike costume is going well though I’m a bit behind schedule. The prototype for the jacket is done and I’m ready to start cutting the final pieces for it. We went through several phases of fitting. The only thing that I really had trouble with was the collar. It wasn’t until the third try that I got the right idea for how to do it. Mike’s a little confused by the whole thing. He’s wondering why his jacket is white instead of blue. I keep having to explain that its a prototype, lol.

 
Ike Costume status:


wig – 50%

I have the wig. I just need to style it

green head band – 0%

cape – 100%

Did this in a couple hours

From Cosplay Ike, the Making Of

blue jacket – 40%

The prototype is complete but now I need to make the final piece. It has a lot of trim so it will take some time to make.

From Cosplay Ike, the Making Of

gloves – 0%
red skirt –
50-100%

I intend to cut up my old Red Link costume to be used for the skirt. Or might not cut it up at all and Mike can just wear it underneath his jacket.

pauldron, chest piece – 5%

I created the patterns for the pauldron and chest leather piece. Both pieces will be made out of craft foam and the belt will be made out of fabric similar to my TP Link costume

main belt – 0%

This piece won’t take long to make

sword belt – 0%

This piece won’t take long to make either

pants – 90%

Pants are mostly done. But they’re fitting a little loose so I’ll probably bring them in a bit.

boots – 0%

These involve a few pieces. Brown boots with black legging pieces and metal tips. I haven’t found brown boots yet. If I can’t find any, then I wont make the boot leggings/tips and he can just wear my black knee high boots

sword – 100%

Found a sword that looks almost exactly like Ike’s from the party store

From Cosplay Ike, the Making Of


My Next Cosplay Endeavor – Ike

From Cosplay Ike, the Making Of
I’ve been meaning to get around to making my boyfriend, Mike, a nice Halloween costume. For the past couple years he’s been wearing an old Link costume that I made for him like 4 years ago. In 2006 I started working on a Gandalf-like wizard costume that I never finished. Last year I was completely dedicated to my Twilight Princess Link costume. But this year I’m going to devote my time to a special costume just for him.
 
He wants to be Ike from Fire Emblem and I’m pumped about making it. It’s going to be even better than the TP Link costume.
 
As for what I’ll be wearing this year, I’ll likely be TP Link again. I don’t want to make a lame costume at the last minute. I did think about possibly doing Zarbon from Zarbon’s Masterpiece Theater but he’s such an obscure character that no one will know who he is. Ike is pretty obscure too though. But both Zarbon and Ike would be interesting visually even if people don’t recognize the specific characters.
 
Anyway, I’ve started putting together a list of fabrics I’ll need and making an inventory of all the costume pieces. I’ll likely buy the bulk of the fabric this weekend and next weekend. I’ve done a bunch of measurements and know roughly how much of each fabric I will need.
 
I will blog the progress of this costume as I did with the TP Link costume.


AX08 – The good, the bad, and the ugly

Micheal Toews, Dan Hummel, and I attended Anime Expo which was located in downtown LA. We made the 7+ hour drive down from San Jose for this con. We were all AX virgins. We came away with lukewarm feelings about the experience.

Cosplay

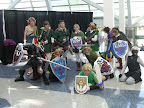
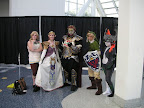
There was a lot of really good cosplay. About the same as what’s at Fanime. You can see my album of photos at:
http://picasaweb.google.com/bogusred/AnimeExpo2008

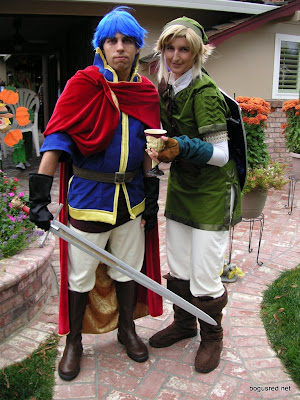
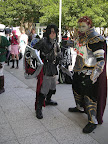
There were a lot of good Legend of Zelda cosplayers:

The cosplay gatherings were pretty good but I think it would be great if the info desks knew about them and could help answer questions about them. I know the gatherings are organized by attendees, usually on cosplay.com, but it would have been nice if there was at least a sign near the entrance saying where all the gatherings were, like with what they did at Fanime. There was a lot of confusion about where the Legend of Zelda cosplay gathering was supposed to be at. Part of this is because this was the first year AX was at the LA Convention Center, so people didn’t know where a good place for the gathering was.

Convention

There were a LOT of people. It was cool to be a part of something so big, but it got rather crowded at times. I wanted to attend the masquerade, however, the line for tickets was really long, wrapping around the building out in the hot sun! No way were we going to stand in that line.

The staff were also not informed enough about how to obtain tickets for masquerade. We got three different answers from staff about where to go for tickets and what the process was. Also the information in the AX booklet was confusing.

That’s another thing. AX really needs to get professional writers to explain information on their websites and in their booklets.AX’s website was awful . It took me forever to figure out how to get the schedule online. Their website is really hard to navigate and the information on each page was poorly organized. Not to mention their web site design was bad. I thought the way they organized the schedule itself was fairly easy to read. But everything else was hard to understand.

We did see a really good movie showing in one of the rooms, but the projector appeared to be going bad as 2/3rds of the way through, the projector got dim. It was a 35mm movie I believe.

The Gong show was kind of cool.

The panel line up did not seem particularly interesting. I don’t think I saw a single cosplay related panel. There were a couple of art panels but I ended up not going to any as none of them really peaked my interest.

Artists alley was amazing. The skill level of the artists and the amount of artists was much larger than that at Fanime. I ended up buying a lot of art. And one of the artists was one I had seen on DeviantArt. It was kind of cool to meet him in person.

Micheal said the lineup of video showings was not as good as Fanime. And he didn’t even like Fanime’s lineup this year so I guess AX’s must have been pretty bad.

Hotel

We stayed at the LA Athletic Club and we most likely wont stay there again.

First off, I reserved my hotel room through the AX website. I managed to navigate through their really poorly made web app to reserve a room and it said the LA Athletic club rooms were 3 people per room. It asked whether I wanted a room with one bed or two beds and I selected two. But when we arrived at the LAAC they said the room only has one bed (a king) and that all of their rooms are like that. WTF?

The lobby area and breakfast area looked really nice. But our room was kind of lacking. The faucets were leaky, the shower head didn’t work well, the mini fridge barely worked, and the only internet access they had was a really flaky wireless connection that kept dropping off every five minutes. We could only get a few bars of signal strength with it. Why, why, why, couldn’t they have a wired connection? This hotel was so ancient.

One thing that was good though was the shuttle system. If you stay at one of the convention center’s list of preferred hotels, there is a shuttle service that will run to and from the hotels and the convention center. This system worked really nicely.

Food

My friends and I were not too impressed with downtown LA. It was very difficult to find a restaurant to eat at. We were hoping to just be able to walk down the streets and find a place to eat. But the area seemed rather deserted and almost everything was closed. Granted, it was on 4th of July weekend, but still, there should have been more places opened. Not to mention the place was filthy. A lot like San Francisco.

We did find a really nice sit down restaurant called Wokcano that serves Japanese, Thai, and Chinese food. It was really good. I’d recommend it if you are in the downtown LA area.

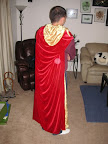
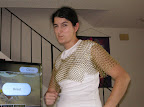
My Cosplay Experience

Cosplaying was fun but it wasn’t as fun as Fanime. At Fanime, random fangirls would come up to me and hug me. Not so much of that at AX. I think the maturity level at AX is probably much higher.

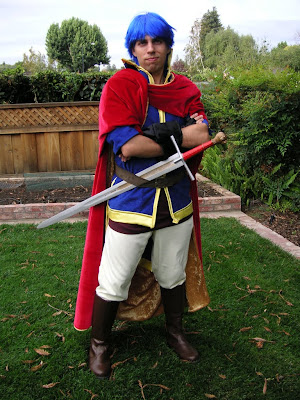
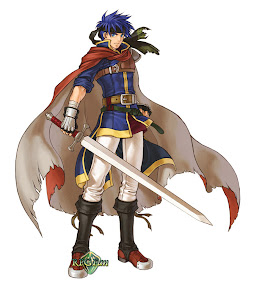
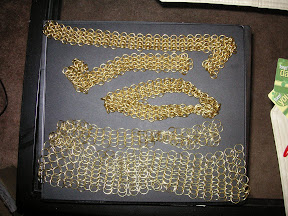
I only wore my costume on Friday and Saturday. By mid-day Saturday my chainmail started breaking. I could hear and feel the rings popping off throughout the day. By the evening my chain-mail was drooping down my arms. I went back to the hotel room and took it off. I’ll need to do quite a bit of work to repair it.

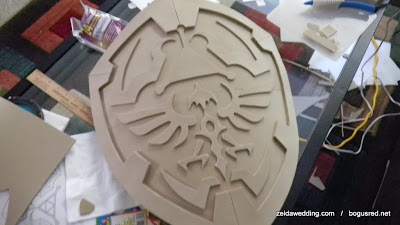
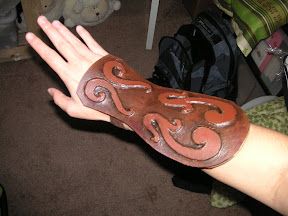
It was really painful carrying around the shield on my back with the chain-mail on. I had indentations in my shoulders from the rings. But carrying it on my back was way better than on my arm the whole day. The darn thing is really heavy.

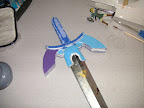
My sword worked well. I had no problems with it.

There was a really good Princess Zelda and Gannon from Twilight Princess. I had signed up and pre-paid for a photo shoot and invited the two of them to come along. Unfortunately, my photographer stood me up so I couldn’t get good photos taken. But here’s a photo taken of us with my camera.

So in the end…

So all-in-all it was fun but perhaps not worth the 7+ hour drive. We may or may not attend next year. Perhaps we will just stick toFanime.


AnimeExpo costume update

AnimeExpo is this weekend. Some friends and I will be making the 6+ hour drive down to LA on Thursday night. I’m really excited. I’ve never been to an Anime con other than Fanime.

I’ve been feverishly working on my Link costume to get it finished in time for the con. Originally I was going to be in the Masquerade. However, a week ago I found out that if I wanted to be considered for a craftsmanship award I needed to sign up for a craftsmanship meeting. Sign ups for that happen on Thursday only and since I’m only going to be there Friday-Sunday, there would be no way for me to get one. So I dropped out 🙁 But maybe I can compete next year.

The first thing I’ve been working on is the Chainmail. I’ve finished the upper chainmail shirt and its ready to wear. I’m still working on the skirt. I don’t think I’ll have enough rings nor the time to make it all into one long shirt piece. But I think I’ll at least have the upper chainmail that shows. Here’s a picture of what it looks like. I’ll be working on the skirt during the road trip down and late at night in my hotel room.

Next, I needed to remake that crappy sorry excuse for a gauntlet. The first one I had made really quick before the D-Day event at SJSU and then tried to rush it again for Fanime. It was complete enough to wear, but it looked like crap. Other Twilight Princess Links at FanimeCon had much better one’s than mine.

I decided to scrap it except for the straps. I made a new one out of craft foam and it turned out wonderfully. I then painted it using Liquitex professional paints. I’ll post a more detailed blog entry later on how this piece was made. Check it out…

Lastly, I decided my sword needed some reworking. I ripped off the hilt and started working on a new one out of craft foam. But I’m a little worred because the blade may fall off the hilt if I’m not too careful with it. I still have a lot of work left to do on this so I don’t have any pictures to share yet. I’m staying up late tonight and working all day tomorrow on it. Hopefully it will be done before I hit the road!


UPDATE @ 3:30am July 3rd

Ok so when I started working on this sword, I was really unsure and many times through I was freaking out and thoughts like  "Man… there’s no way this is going to work…," "how the heck am I going to do this?,"  "I have no idea what I’m doing," and "You are an idiot for doing this at the last minute" kept popping into my head.

But now my sword is actually starting to come together nicely. There will be many details that will be left out in the interest of time including the little gold jewel, some sculpting on the handle, etc, but I can always add those later. All that’s left is to wrap a piece of foam around the handle portion and paint everything. (Please note that the color you see on the hilt is the color of the craft foam and will not be the final color.)

There are also a few proportional issues with the hilt. Namely, the blade is too small for that big hilt. But you know what, craft foam is hard to work with! And I think it looks pretty good.

If time allows, I’ll post an updated photo tomorrow.


New Chain Mail Started

I had mentioned in a previous blog post a bit about the troubles I had with my last attempt at making Chain Mail for my Twilight Princess Link costume. I just got my new rings today and wanted to give an update on the status.

Strike 1
The first thing I tried was to buy galvanized fencing wire and make the rings myself spinning the wire on a dowel rod connected to a power drill. I bought many of the supplies but a friend of mine with experience making maille talked me into buying my rings online instead.

Strike 2
I purchased 14 gauge 1/4inch diameter rings from TheRingLord.com in Brass. While I was pleased with the color, I had trouble working with the rings. It was quite difficult to put two 4-in-1s together and it was almost impossible to put two lengths together. I attempted to just do a 4 ring tall length around the trim of my tunic but the weight of the metal was too much and made the tunic sag.

Hit?
So then I decided to order rings at a higher gauge (thinner) with a larger diameter, again from TheRingLord.com. I went for the 16 gauge 3/8th inch brass rings. They arrived today and already I’ve created almost the same amount of maille that took me weeks to do with the 14 g 1/4inch rings. My only concern is that since the 16 G is so thin, its hard to meet the edges when closing the rings and there is opportunity for some of the rings to come undone. I’m also not sure how well it will all hold once I make a whole suit out of it. The suit will probably end up being super light. Which is good since I’ll be wearing the costume all day long at the con. If I run into problems with the new maille I will post it in my blog.

If I could go back in time and change my order, I’d probably go with the 14 G 3/8th rings instead.

At the rate I’m able to make the maille, I can probably have the shirt and the skirt done in time for AX.

Below is a picture showing the 14 g 1/4th inch rings against the 16 g 3/8ths at the bottom. I think the smaller rings look more like real maille since there isn’t as much gapping. But I think this is good enough for a costume. Again, note that the top half took me weeks to make where as the bottom half took me one night.