New Chain Mail Started

I had mentioned in a previous blog post a bit about the troubles I had with my last attempt at making Chain Mail for my Twilight Princess Link costume. I just got my new rings today and wanted to give an update on the status.

Strike 1
The first thing I tried was to buy galvanized fencing wire and make the rings myself spinning the wire on a dowel rod connected to a power drill. I bought many of the supplies but a friend of mine with experience making maille talked me into buying my rings online instead.

Strike 2
I purchased 14 gauge 1/4inch diameter rings from TheRingLord.com in Brass. While I was pleased with the color, I had trouble working with the rings. It was quite difficult to put two 4-in-1s together and it was almost impossible to put two lengths together. I attempted to just do a 4 ring tall length around the trim of my tunic but the weight of the metal was too much and made the tunic sag.

Hit?
So then I decided to order rings at a higher gauge (thinner) with a larger diameter, again from TheRingLord.com. I went for the 16 gauge 3/8th inch brass rings. They arrived today and already I’ve created almost the same amount of maille that took me weeks to do with the 14 g 1/4inch rings. My only concern is that since the 16 G is so thin, its hard to meet the edges when closing the rings and there is opportunity for some of the rings to come undone. I’m also not sure how well it will all hold once I make a whole suit out of it. The suit will probably end up being super light. Which is good since I’ll be wearing the costume all day long at the con. If I run into problems with the new maille I will post it in my blog.

If I could go back in time and change my order, I’d probably go with the 14 G 3/8th rings instead.

At the rate I’m able to make the maille, I can probably have the shirt and the skirt done in time for AX.

Below is a picture showing the 14 g 1/4th inch rings against the 16 g 3/8ths at the bottom. I think the smaller rings look more like real maille since there isn’t as much gapping. But I think this is good enough for a costume. Again, note that the top half took me weeks to make where as the bottom half took me one night.


Drawing Day, Prep for AnimeExpo 2008

Yesterday was Drawing Day! What’s Drawing Day? Well its basically a day that this guy made up to promote drawing and more online art community activity. Which I thought was pretty cool so I enrolledPaperDemon as an official participant in the event. We were listed as a Gold Supporter because of the prominent exposure we had on our site for Drawing Day.

Here’s my main submission for Drawing Day. I hadn’t done any really good Link illustrations in a while so I thought this would be a good time to do one:

I had so much fun at FanimeCon this year that I decided to go with some friends to AnimeExpo in LA. So if you’ll be attending that con, be sure to look for me! I signed up for a photo shoot with Consplayers.com to get some nice professional photos of my costume. This means there’s even more pressure to make sure my costume looks fantastic.

There are a couple things I will attempt to fix in my Link costume before the con. First, my gauntlet is a piece of crap. Every TP Link at Fanime had a better one than me. I found a great tutorial online for making a similar armor piece out of craft foam. I’ve also got my acrylic paint handy for adding details and weathering. Plus this should not take too long to make compared to other parts of my costume.

Secondly, the hilt of my sword. The blade looks fine but the hilt is not the right shape or color. I’d like to see if I can figure out a way to make a better hilt out of craft foam. I remember going to a panel in 2001 at Fanime hosted by the Stitchin’ Babes in which they described their process of making props out of craft foam. But it’s not the same method as described on many tutorials online. Theyactually glued layers and layers and layers of craft foam together. Then carved it the way they wanted, sanded it to get finer smooth shaping, then sealed it and painted it. The result was a very light weight 3D weapon. You could use this method for creating really big props. Unfortunately, I don’t have all the details of this technique and have not had much luck finding a tutorial for this process online. I did find a tutorial though on using craft foam for making armor but this isn’t the same process because it doesn’t involve gluing many many layers and carving them. Perhaps I could give it a try on my own. I think my biggest question is what glue to use. What kind of glue would be able to hold multiple layers of craft foam together without falling apart when being carved/sanded?

The next thing is the chain mail. I did start some chain mail a couple months back but it failed because the rings were too thick and too small to work with to create a big enough length. So I’ve ordered some thinner, bigger rings. I know the pattern fairly well now so I think I can make the mail pretty fast and easily. I wont make a whole shirt, just enough for a half shirt for the parts that show.

I will update my blog with relevant news on my costume in the coming weeks. Only three more weekends left until AnimeExpo!


Fanime 2008 Report

It had been 5 years since I last went to FanimeCon.

I was surprised by the number of cosplayers. I think most people were in costume of some kind. Back when I first started going to the con, maybe only 15-20% of attendees cosplayed. I was also impressed with the quality of the cosplay. Most of the cosplay I saw back when I first went to Fanime in 2001 was really crappy. They were mostly costumes people put together at the last minute.  But this year a lot of people had really fantastic costumes. I took almost 300 pictures at the con. Seeing all of the greatcosplay really inspired me to want to make more costumes and do even better next time.

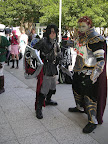
My favorite costumes were the creative ones. Like this costume of Cloud in drag. Remember the part in Final Fantasy VII where you have to dress Cloud like a girl so he can pass as a prostitute?

Popular cosplays were Naruto series, Mario brothers, Legend of Zelda, Chobits Persacomps, characters from Final Fantasy VII (mostly the new generation stuff like advent children and the new spin off games). 

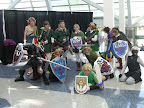
Link was popular and I think I got a photo of almost every single one at the con. I saw Links from Wind Waker, Twilight Princess, and Ocarina of Time. There was even a WW Link in his pajamas which was super cute.

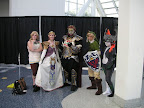
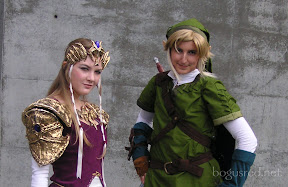
And whenever Link and Zelda stood next to each other, the cameras started shooting like crazy. I saw three Princess Zelda’s at the con and they all looked great. But I think this one was the best one.

There was one Link in particular that I had a couple of memorable moments with. I took a photo of him and then my friend Potter said I should get a photo of the two of us battling. I asked him "Hi Link, can we battle?" And he said, "Oh… No sorry" and I said "No, I mean for a photo." And he said "Oh!Ok !" I guess he was afraid of me and thought I meant to really fight? One other time, my friends and I and some other people were on a crowded elevator. It stopped at a floor and the same Link walks on and Potter jokingly says to him "Oh sorry, no Links allowed on this elevator." And he walked off of it! Everyone felt bad for him. Link, I’m sorry my friend was so mean to you!

If there’s one thing I’ve noticed, it’s that girls LOVE Link. If you are a guy and want to get some love at the con, cosplay as a decent Link and random girls will glomp you and hug you. I think I got hugged by 30 different girls and even a few guys. A lot of people wanted to get their picture taken with Link also. I really enjoyed playing the part of Link and getting my picture taken. Though I think I could have done some better poses. I look too girly in my pictures. I will practice some better poses before the next con.

There was this one group of girls that kept sneaking up behind me and yelling "Hey! Listen!" It wasn’t until the third time that I finally got what they meant. They were imitating the annoying fairy, Navi, from Ocarina of Time who always says "Hey! Listen!" When she has something important to say. Other hi-jinks were abound at the con as well. There was a game of "Link tag" going on Sunday at one point.

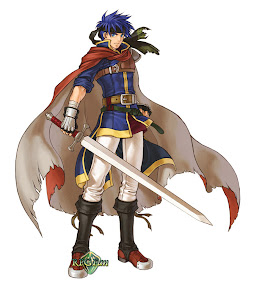
So I’m feeling depressed that the con is all over. I’m starting to make plans with my friends to attend AnimeExpo in July. I’m also starting to think about what to cosplay for next year. I’d like to do what i did last time and create my costume for Halloween then reuse it at Fanime. So far my plan is to create an Ike (from Fire Emblem) costume for Mike to wear. I may create a simple costume for myself or I may not even go through the trouble of creating a new costume. I have so many other projects right now I shouldn’t start another one.

My Link costume still needs some work. My arm guard thingy that goes on the sword hand looks like total crap. I put it together really quickly so that’s why it looks crappy. I will work on an improved version before the next con. I also want to try and create a new hilt for my sword. The chain mail situation doesn’t look good. I had created enough for the rims of my tunic but when I attached them it made the tunic sag and look awful so I ended up not using it at the con. I tried making a wider length of mail but with the gauge and size of the rings I’m using its really difficult to link them together. So I’m going to  start over with bigger, thinner rings. I’ve signed up for a photo shoot with Consplayers.com at AX. Hopefully I’ll have all the tweaks and the chain mail done by then.


Modding updates, workin’ on ST

My "Project Time" is working out really well so far. I have drafted storyboards for the first two scenes in Surviving Together and started the third. There are a total of 4 scenes. I’m finding it quite difficult to storyboard. It’s difficult to imagine characters in a setting, decide on camera angles, and have it all make sense. I’m also trying to reuse shots whenever possible to save time in the animation stage. Also I’m trying to avoid showing any characters walking because that’s difficult to animate. I want to get this first episode done. Then I can work on more challenging animation shots. Right now I’m being as conservative as possible. Once I have the boards together I’ll scan them all in and create an animatic to share with a few people to give me feedback. More updates to come.

I’ve spent some considerable time the past couple weeks reworking the tools the Moderators use at PaperDemon. We’ve been short staffed as of late and there have been a lot of submissions coming in. I figure if I can improve the tools to make it easier to mod and have it take less time, we can get more done with less staff. The tool uses a lot of nifty AJAX. I just learned XML and XSLT at a 1 day class at work and am trying to put it to good use. I have a php script that generates the XML file and an XSLT style sheet that states how the file should be formed. Then I use Sarissa to submit post data of my form, get the xml back from php, and then apply the style sheet to the data.

So far the only problem I’ve run into that I can’t solve is that it doesn’t work for some reason in IE 6. I haven’t tried it on 7 yet. Sarissa has trouble applying the XSLT on the XML for some reason. It  doesn’t make any sense because if I access the XML file directly and put in a line in there to use my XSLT file it outputs the formatted HTML correctly without any errors. Is this a problem with Sarissa? I tried searching the net but haven’t found a solution yet. Works just fine in Firefox.


Project Time

I recently posted an update on PD Media explaining the recent troubles with the team and status updates for the projects. The new anime spoof show is on hold. But I’m going to go ahead and start working on Surviving Together again. One trouble that I have is that I have a lot of time in the evenings but I don’t use it effectively on my projects. I end up watching a lot of tv or hanging out with my boyfriend. So I’ve devised a solution. Certain nights of the week will be designated as "project time" and I’ll work whether I want to or not. Because if I force myself, five minutes into it I’ll be engrossed in my work. It’s always been the ‘getting started’ part that keeps me from being productive.

So tonight I’m working. And I’m starting off with this blog post to get me pumped!

After I post this entry I’m going to get into working on the storyboards for Episode 1 of Surviving Together.

PaperDemon.com, geek alert
I’ve done some significant improvements on the moderator tools for PD. I took a class at work on XSLT and XML and I’m putting those skills to use in the new mod tools making things ajax powered and stuff. It’s coming along nicely. I will continue to improve the mod tools over the next couple months. XSLT is pretty sweet. I really like the idea of separating the data from the control of the layout. There’s just one thing that bugs me about XML though. Why on earth would you make the XML file decide which XSLT sheet to use? It makes no sense. I think the XSLT file should decide which XML file to use instead. The whole point is to be able to manipulate the same data in a variety of ways. But if you make the XML file declare which XSLT sheet is used, it means you have to duplicate the xml file in order to use the same data with different xslt sheets. Which defeats the whole purpose.
But I did figure out that you can use PHP and even Sarissa, an AJAX library for Javascript, to apply an XSLT file to an XML file on the fly. So that way I can keep things truly separate and flexible.

UPDATE
Turns out that applying xslt via the browser is not fully compatible with all browsers so I’ve switched to having PHP apply the xsl to xml. It’s faster this way anyway. I’m also migrating from Sarissa to jquery for AJAX interaction.

Link Costume
D-Day happened at SJSU a couple weeks ago. I don’t have too many pictures yet but when I get them I’ll post them. I finished a lot of what I needed to. Boots and wig are done. I started the gauntlet but its looking too small. May need to remake it. So all I plan to get done before Fanime is the gauntlet and the sheath covering for my sword. Chainmail is taking much longer than expected. I do have two sets that could be put along the rim of the tunic but it’s too heavy for the tunic to hold and looks stupid. I’ll either need to make a complete top half of the chainmail shirt or buy lighter rings. Anyway, I’ll save it for next Halloween.

Plans for BogusRed.net
The design is getting stale. I plan to redo the site template and put some more content on it. I’ll tap into the PD database and display my artwork from there over on BogusRed.net. I also want to integrate some feed content. Particularly my shared content from Google Reader.


One boot done

I just wanted to make a quick post showing the status of my boots. I’ve finished one boot and it looks pretty awesome. Here’s a picture showing before and after of the boots. One on the left is the Link boot, one on the right is what I started with. I still have a bit of tweaking to do on it but it mostly looks the way I want it too. By the way, these boots cost me $7 at Good Will.


Started the Chain Mail

In my last blog entry I talked about how I planed to make the rings for the chain mail myself based on a tutorial I found on youtube.  A couple weekends ago I visited a friends house and heard he had experience making chain mail shirts and such. I talked to him about it and after talking with him I was convinced of two things. One, creating a whole suit would not be a good idea because a) it would take too long and b) it is too darn heavy. I tried on his chain mail shirt and I know I would be dying after walking around a whole day wearing that thing. Two, not to make my own rings. Instead, buy them online from TheRingLord.

Purchasing premade rings has its advantages. For one, there’s better selection of metal, color, diameter, and thickness. I purchased three pounds of the 1/4 inch brass 14G rings. My friend suggested that 2 pounds would be enough to cover the little spots on my Link costume that show the chain mail so I went ahead and got 3 just in case. Now that I’ve got it, I’m not sure 3 is enough. I also wish I had either gone with a larger diameter or something less thick because the 1/4 inch 14G is difficult to work with. But I’ve started to get the hang of it. It’s going to look hella sweet once it’s done. It’s also a nice color. It’s a better match to the color of Link’s chain mail. My hands are pretty sore already after two nights of linking rings.

I’ve decided not to do the skirt by Fanime. Instead it will be a goal for Halloween. Link’s skirt area of his tunic has a slit on each side which means if I want to have chain mail there I’ll pretty much have to make an entire chain mail skirt. And if I am going to make a skirt I want to make it out of thinner and bigger rings. Perhaps that will be a goal to complete by halloween.

More updates to come.


Preparing for Fanime, revisiting TP Link costume

Fanime is only a couple months away and I plan to wear my TP Link costume to it. There are a few things I still have left to work on and two months should be plenty of time to do it.

Unfinished items
High Priority
These are things I really want done before I wear this costume again.

  • Sheath – I have a plastic black sheath that came with my crappy sword. I’m going to create a fabric covering for it to make it better match the costume.
  • Shield – it broke on Halloween. I’ll be fixing it with my new drill today or tomorrow 😀
  • Wig – I have a second wig with some hair that I’m going to cut off and stitch to pieces of fabric, then sew it onto my Link wig to create the long parts that come down in front of the ears.
  • Boots – described in more detail below.
  • Tunic inside seams – I never ‘finished’ the edges on the inside of the tunic and its already starting to run. I should take care of this before I wear it again or the thing might fall apart.

Medium Priority

  • Shield Harness – A friend mentioned he had seen cosplayers use those zippy ties to tie props to their back. I bought some extra large heavy duty ones. I’ll give those a try and see if they work so that I can attach my shield to my back instead of carrying it on my arm all day.
  • Chain-mail – Its such a small detail but I think it adds another level of authenticity to the costume. I can live without it but why not give it a try.
  • Gauntlet – TP Link has a leather gauntlet on the arm that holds his sword (left hand in Cube version, right hand in Wii version). It’s another one of those things that people wont notice if its missing, but its nice to have.

Low Priority

I probably wont even get to these items before Fanime and that is totally fine with me. I’ll just take care of these before Halloween ’08.

  • Pant hem and tie string – They haven’t been hemmed. But no one’s going to see because it will be covered by the boots. I’m using a temporary strip of rope to tie the pants.
  • Hat detail – There’s this little seam near the tip of Link’s hat that I never got around to adding. I bet no one will notice its missing.
  • Tunic neck trim – Sometime I’d like to redo the neck trim. It didn’t come out perfect. This is the lowest thing on my priority list.

Getting Started

The biggest projects are the chain-mail and the boots.

I already have a nice pair of brown boots, but I plan to sew a new pair of "sleeves" for them. Not sure how else to describe it, but the material is kind of a shiny leather and I’d like it to match the other soft brown segments of my costume. I’m going to first make the pieces in muslin and use them as pattern pieces for cutting the final material. I’ll also need to figure out how I’m going to do the little bit of detail on the sides of his boots. Embroydery would be cool but I don’t have a machine for doing it and don’t know how to do it. I’m thinking I’ll just use the sewing machine to stitch the outline of his pattern, maybe put some interfacing in place to keep it from weakening the material. There are also some other details like the cuffs at the top of the boot that I’ll be adding.

The chain-mail is going to be a bit of a challenge. I found some great resources online on how to do it. My biggest challenge so far with it has been finding the correct wire. In Kurnous34’s chain-mail tutorial, he recommends ungalvanized stainless steel 14 gauge electric fence wire but unfortunately, I cannot find ungalvanized anywhere. All I’ve been able to find is galvanized steel. And even that is hard to find in the hardware stores. I did find it in Lowes and Home Depot, but they only came in lengths of 100 feet for like $6 which is a rip off. So I went online and found 1/4 mile for around $25 + shipping. I have purchased the rest of my supplies from Orchard Supply Hardware:

  • variable speed drill
  • wire cutters
  • gloves
  • safety glasses
  • 1/4 inch diameter, 1foot long metal rod (this was hard to find in the store but I did get it at OSH)
  • 2 clamps
  • 2 pair pliers (had these already so didn’t need to buy them)

Kurnous34 says you shouldn’t get galvanized wire because it contains chemicals that can rub off onto your clothing and stink. But Patrick Innes makes chainmail from galvanized metal without problems. I also read the comments on Kurnous34’s video and some said they used galvanized without problems. I plan to hold a rag in my hand while I’m feeding the wire around the rod and whipe the chemicals as I’m doing it. Maybe I can hose some of the chemicals off too. Anyway, all the chemical is is Zinc to keep it from rusting.

I’m only just getting started. I’ll post details of the progress of the boots and chainmail when I have them.


Artist Shopping for a Tablet PC

This blog entry is a long drawn out explanation of my recent experiences trying to purchase a Tablet PC. If you are an artist thinking about buying a Tablet PC and aren’t sure which model to get this blog entry may offer some information on the subject.

Why I’m buying one
I’ve been using Wacom tablets for about 8 or 9 years now. Though I love painting digitally, the beginning drawing process has always been a bit of a disconnect for me. For some reason, proportions and my line quality from drawing completely digitally have not been as satisfactory as the results I get with good ol’ pencil and paper.

But recently I’ve been working more on a Tablet PC issued to me at my job. The first one I had at work was a IBM X41 Tablet and it was way too slow and to me was unusable for drawing. The processor was fast but the major flaw was that the hard drive was too slow. PhotoShop and other graphics programs typically use part of the hard drive as a ‘page file’ meaning its substituting part of the hard drive as RAM.

But a couple months ago I got upgraded with an IBM Lenovo X61 Tablet. It’s an updated version of the X41 and man it works really well! I’ve found myself trying to do more drawing. And I can now see myself possibly doing almost every illustration and drawing digitally from start to finish. I am so satisfied with the experience that I’ve decided that I want to go ahead and purchase a Tablet PC for myself.

My Requirements
I want something much more portable than my current personal laptop (a Toshiba Satellite that weighs 9lbs). Something around 4 or 5 pounds would be ideal. I also want it obviously to be a Tablet PC and have the processing power+RAM to handle the resource hogging graphics programs like PhotoShop and Painter without any noticable lag while drawing.

Researching – The Right Tablet for Drawing
I started at first online. I knew that there were multiple types of tablet pc technologies out there. One of which is the Wacom Penabled digitizer which is available on my Lenovo X61. This digitizer allows you to get pressure sensitivity on a tablet pc. The pen that the laptop comes with is very similar to the pen used for the regular wacom tablets. I believe you can also buy special wacom pens for the tablet pcs just as you can for the regular wacom tablets (I think the tablet pens and tablet pc pens are not interchangeable though).

Now, out of the box, a Wacom Penabled Tablet PC will NOT have the pressure sensitivity. You have to download a driver from Wacom’s website in order to get that functionality. However, the Tablet PC you decide to purchase has to already have the Wacom Penabled technology otherwise the driver wont work. You can only get the pressure sensitivity if you have a Wacom Penabled Tablet PC and download and install the driver.

While browsing online at the different laptop models, the first thing I looked for was that the laptop was a Tablet PC with the Wacom Penabled. Many of the tablet pc manufacturers websites did NOT indicate whether the model had Wacom Penabled or not. It was very frustrating. I had heard somewhere or read in a forum post someone saying that most Tablet PCs made these days have the Wacom Penabled. I didn’t want to buy anything without being certain it had the Wacom digitizer. It’s a good thing too because I later found out that most do NOT have Wacom! So it was very confusing trying to figure out which Tablet PCs had the Wacom technology and which ones did not.

I went to Wacom’s website to see if they could offer any answers. But all that their website says is a list of manufacturers that use their technology (ie: IBM, HP, Fujitsu, Toshiba, etc). It does not say which models have the Wacom technology, which is what I really needed to know.

My InStore Shopping experience
So I decided that maybe if I saw the computers in a store and was able to talk to a sales person I might have better luck getting my questions answered. I started with Best Buy. I was expecting that they wouldn’t know much there but I was hoping they’d know something about Penabled . So I asked the sales person if they had any Tablet PCs and the sales person showed me an HP Tablet PC. I asked him what kind of tablet technology it had. I think he looked at the specs and didn’t find any information there. So I asked him if the HP had Wacom Penabled Technology. He didn’t know that either so he asked another sales person. I overheard him talking to the other guy and the second guy said "Uh I think she means the Wacom Tablets. Those are a separate device you buy to use with your computer." I walked over there and explained that Wacom also makes tablet technology for tablet pcs. He tried to convince me that I didn’t know what I was talking about and that the Wacom Tablet is a separate device. I went into further detail to explain it. I ended up educating the sales people and not getting any answers for myself. I didn’t like the HP anyway, the screen was too small. I left the store not knowing whether it had wacom or not. This sketchbook entry I made recently illustrates my frustrations: [thumb17790]

Then I went to Fry’s electronics. The sales person showed me three tablet pcs that they had. Two of them were HP’s (one was the same one I saw at Best Buy) and a Fujitsu T4220. I asked him if any of them had Wacom Penabled and he didn’t know the answer but another sales person walked by and overheard our conversation. He said the Fujitsu was the only one they had with Wacom Penabled and showed me the sticker that was placed on the display unit. Yes, finally I see proof that a laptop is out there with Wacom Penabled ! So I asked a lot of questions about it. Namely, why the Fujitsu was over 800 dollars more than the HP. I liked that the Fujitsu was light weight and powerful. It also had WindowsXP Tablet edition. The sales person seemed annoying though. He didn’t really know the answers to my questions and just was not giving me any concrete answers so I left figuring I’d look at what other stores had to offer.

I called another computer store in the area asking if they had any Tablet PCs and the only one they had with Penabled was the X61 which was my work laptop. I didn’t want to get the same one because I was hoping to get something faster and nicer looking. the X61 is too corporate-ish for my personal one.

And that was the last of the computer stores I knew of. I decided to do some more online research.

More Research
I did a lot of reading on the forums at tabletpcreview.com looking to see what laptops artists were buying. I wanted to see which models people were thinking of buying and which ones they ultimately bought and liked. There was a lot of useful information there. I saw that the tablets mentioned by artists were the Fujitsu T4220, the Scribbler, Toshiba M400, and the Motion Computing LE1600, in addition to a few others.

I had heard about the Scribbler several years ago. i saw an ad for it that was marketing it directly as a tool for artists. But the only way to get it is to purchase it online and I wasn’t too comfortable buying a laptop from a company that only sells one laptop product and have no way of easily getting it serviced if there’s a problem. I also kind of didn’t want to buy it without seeing it first. I seriously considered it though because its got insanely long battery life and its a Slate tablet meaning the keyboard detaches from it so that you can just take around the screen and draw. But the technology for these is typically behind other laptops because they have to compress the motherboards, memory, cpu, harddrive, etc into a smaller unit. That and its a lot more expensive. So it was on my list but I ultimately decided against it.

I went to Fujitsu’s website to find out more about the T4220. I learned that there were a lot of customization options including getting an SXGA+ screen  which has a higher density of pixels meaning the resolution is 1400×1050 instead of 1024×768 for a 12 inch screen. It was only $50 extra on Fujitsu’s online store.

I concluded after lots of online research that most likely all of the Wacom Penabled laptops are going to perform pretty much the same no matter which one it is as long as the RAM and CPU are good. So the best thing to do is go with something I liked with the specs I wanted. It’s really a matter of personal choice.

My first purchase, the Fujitsu T4220
I decided to go back to Fry’s and give the Fujitsu T4220 another look. I asked if I could get the SXGA monitor but they said they couldn’t really do any customization save for adding more RAM. They just get one premade model from Fujitsu and that’s it. This was a big disappointment for me but because I knew Fry’s had a good return policy, I thought I’d give it a try. If I didn’t like it, I could just return it and get a full refund. Plus I could try it out right away.

Playing with my first Fujitsu T4220
I liked it a lot at first. The keyboard has a nice feel to it and it looks nice. The screen was a little bit brighter than my X61. I did some informal tests with PhotoShop and Painter on the T4220 against the IBM X61. I tried an 8×10 inch canvas at 600 dpi and brought out a super big brush like I would do to fill the background with a wash. It lagged pretty bad on the Fujitsu but it was still better than the X61. My graphics cohorts tell me that its because I’m working at too high a resolution. But I personally always work at 600-1000dpi with an image anywhere from 6 to 10 inches wide.

Overall I liked it. It wasn’t too different from my work one. But the performance fell a little under my expectations. And I was not satisfied with the resolution of the screen. I was missing having the SXGA+ display that I originally wanted. 

An artist friend of mine has a Toshiba Portege with the SXGA+ screen and loves it and that convinced me to return the laptop to Fry’s and purchase the same model direct from Fujitsu customized the way I wanted it. I’ll end up with a better machine and it will end up being cheaper. I’ll be ordering it tomorrow.

I had no problems returning the laptop to Fry’s. They took it without asking any questions and didn’t charge me any restocking fee.

It will likely be a couple weeks before I get the new laptop because they’ll need to build it and ship it to me. I can’t wait to get it though.

Update and Conclusions – August 22, 2009

I’ve gotten a few emails recently about my laptop buying experience and a few items have changed since I originally posted this.

First, I did receive my Fujitsu T4220 and love it! It works very well and still works great to this day. However, since getting a Wacom Cintiq, I rarely use my tablet PC for drawing. Mostly I use the Fujitsu when traveling. The Cintiq is pricy but if you can afford it and are not looking for a portable tablet solution, I highly recommend buying one. It will change the way you draw!


Sketch Blog for real

Wow ok so I’m actually making a "sketchblog" post. Woo!

I’ve got a tablet pc laptop for work and I’ve been thinking about buying my own. My work one is cool but it’s really slow. It’s not because it has bad parts. It’s brand new with a fair amount of ram and a fast processor. But unfortunately the drive is encrypted so every write action to the drive is slowed down by the encryption. I’ve especially been frustrated with Painter. It’s so slow that its unusable when working in really high resolutions.

What resolution and dimensions do you guys work in when doing digital works? I usually do 600 dpi in 8 x 10 inches. A couple of people tell me I work at too high a res but I don’t think this is too high. At this resolution, I can print it on 11×17 posters at 300 dpi. Actually sometimes I work at 800 dpi if i have something i think i’m going to print large.

So I’m trying to decide what kind of laptop I want. I may decide not to get one and just use my work one. But I’m not sure yet. But anyway, while I was researching laptops I came across this forum post where this guy mentioned a program called ArtRage, stating it was a must have freeware for all artists using tablet pcs. I checked it out and downloaded it. Within 20 minutes of loading it I fell in love with it. It’s really light weight so it runs well on slow machines. It’s not all bloated like Photoshop and Painter. I decided to invest $25 and get the paid version of ArtRage because I loved it so much.

So now I’m doing some sketching with it. I’m trying to sketch something every other day. Even if the drawing isn’t particularly creative. Just need to keep my hand moving. My first entry was this one: [thumb17723]. Today I have my second entry…

[thumb17745]

Today I had some time to draw and wasn’t sure what to draw. I looked around me and saw a Viking hat that a coworker had put near my desk earlier that day. So I thought, hey I’ll draw myself with the hat on. Like a sort of silly self portrait. Why the heck not?

Next time I’ll try out one of those idea generators.